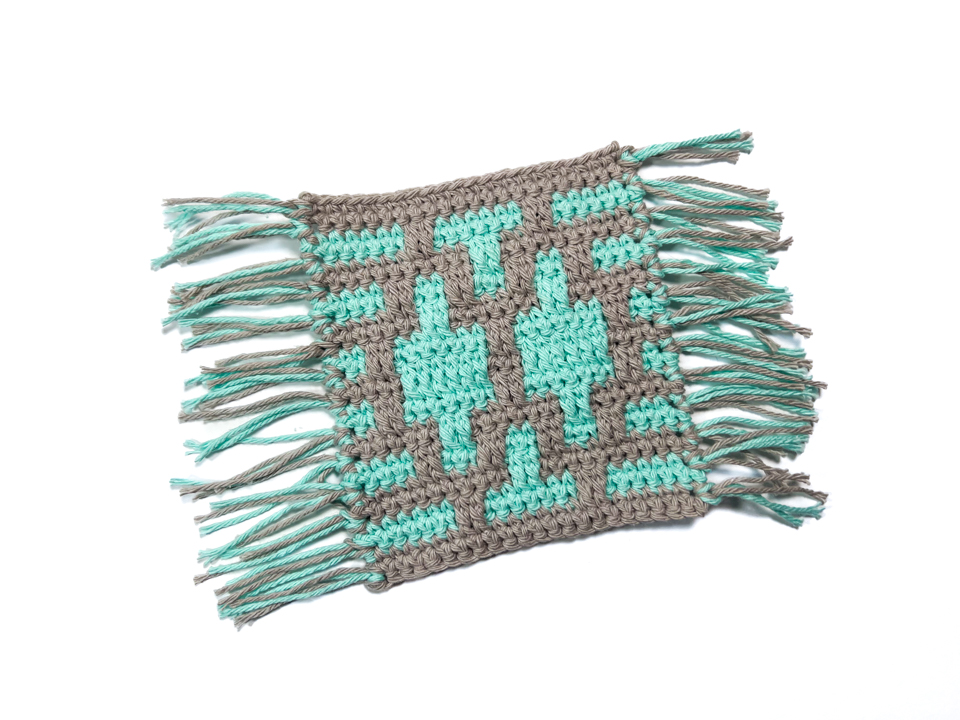
Diamond Inset Mosaic Mug Rug
Test your mosaic crochet mettle with this little stash buster perfect for beginners looking to practice the inset mosaic crochet technique. This pattern changes color every two rows, working both left and right to create a flat mosaic pattern.
Finished Measurements
Finished rug measures approximately 4.5” x 4.5″ using a 3.5mm crochet hook and very light size 4, worsted weight yarn.
Materials
40yds / 37m (22g) of a thin size 4, light worsted weight cotton yarn split between two colors
3.5mm crochet hook
Scissors
Tapestry needle (if weaving in ends)
Big Twist Cotton is on the light side of worsted weight cotton yarns and makes a large mug rug. If you’re looking for a more standard size mug rug, stick with a DK weight yarn like 24/7 Cotton DK with a 3.5mm hook.
Pattern Yarn
Big Twist Cotton in Stone Gray and Robins Egg Blue
Abbreviations
CH Chain
SC Single Crochet
SK Skip Stitch
CH SP Chain Space
ST Stitch
DC Double Crochet
Gauge
21 ST and 20 rows of SC is 4” using Big Twist Cotton solids and a 3.5mm hook.
Pattern Notes
Pattern is written in American Standard terms.
CH 1 does not count as a ST.
You’ll change colors every two rows.
To create the pattern you’ll use a combination of chains (when working on the back of the work) and Drop-down Double Crochets (with the right side facing you). The Drop-down DC stitch is explained below.
You may sell small batch, handmade items using this pattern including a link with credit in your product description. You may not redistribute or resell this pattern without written consent from the author. Contact me for pattern licensing information.
If you like these patterns, help me keep this site ad-free.
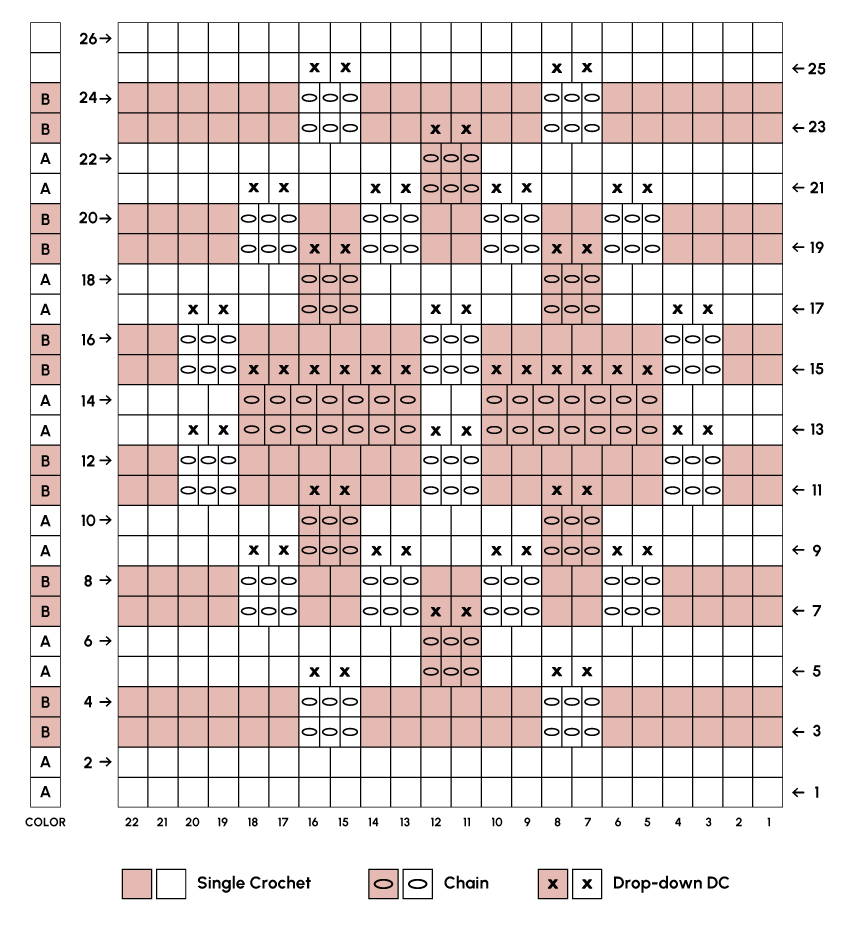
Mosaic Stitch Chart
Work the chart from the bottom up, swapping colors every two rows.
As with standard inset mosaic crochet, for each Drop-down DC, you’ll have one extra CH in the CH SP behind it to keep the finished work flat. I’ve included these extra CHs in the chart for clear reference.
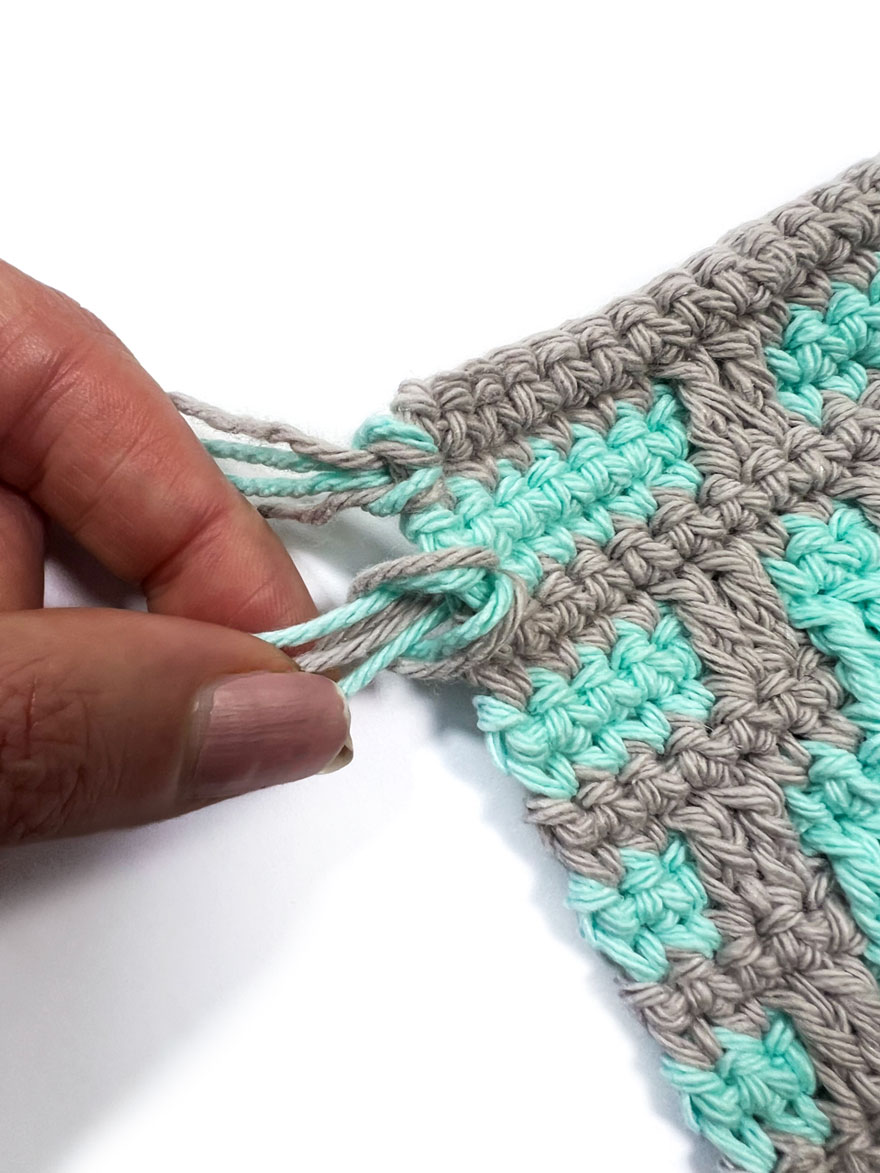
When changing colors, hold the unused color up the side of the work to avoid having a ton of ends.
If you’re not planning to add a border or fringe, you may want to consider stitching your dropped color into the first SC of the next row. This will help keep the carry loops off the side of your project.
Special Stitches
Drop-down DC
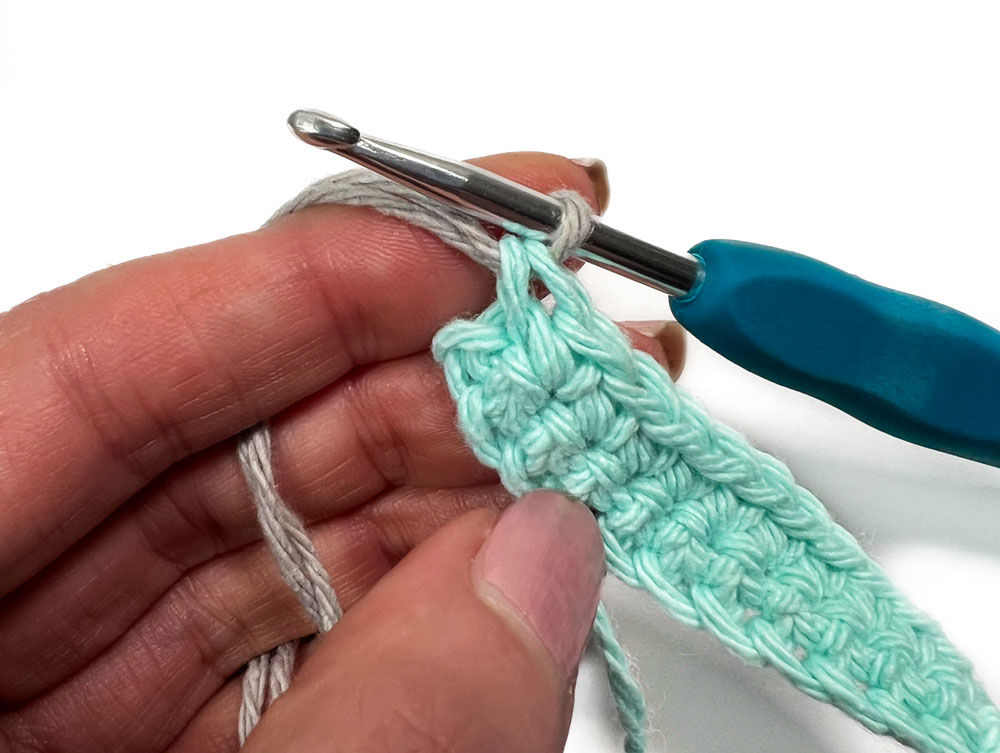
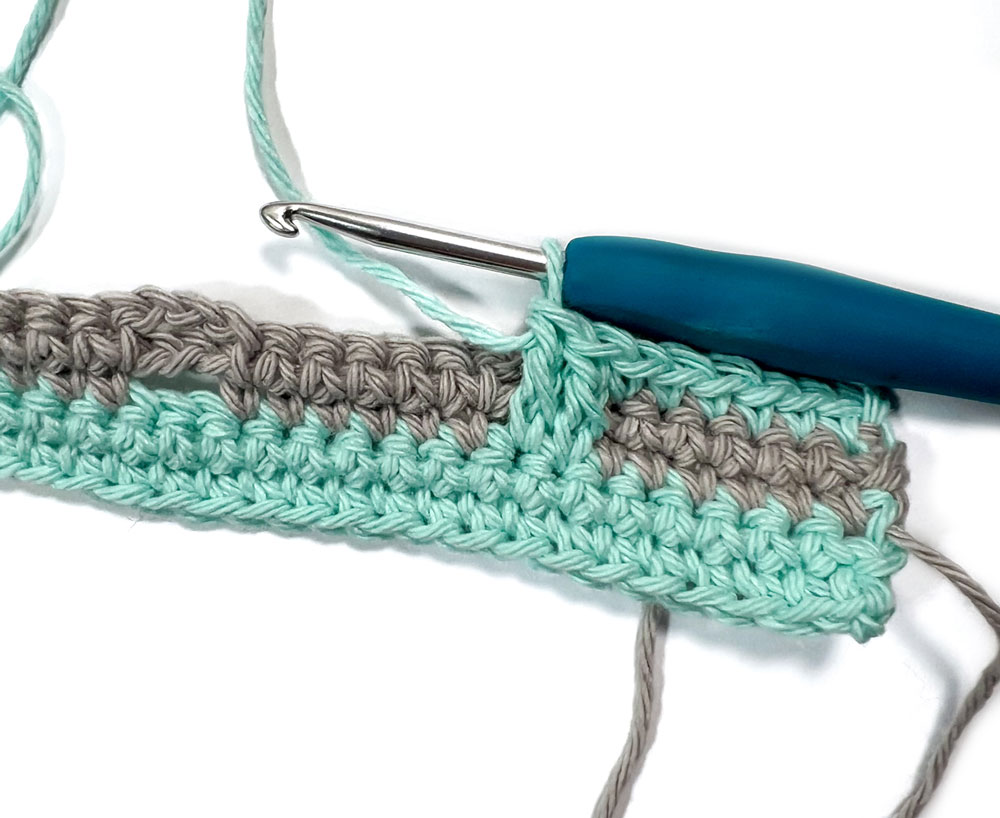
To begin the drop-down DC stitch: yarn over, skip the next stitch and instead work into the top of the stitch 3 rows below (the top of the previous matching color row, as marked with my tapestry needle in the photo).

Make sure to work the new ST in front of the CHs from the previous two rows, rather than working the stitch around them.
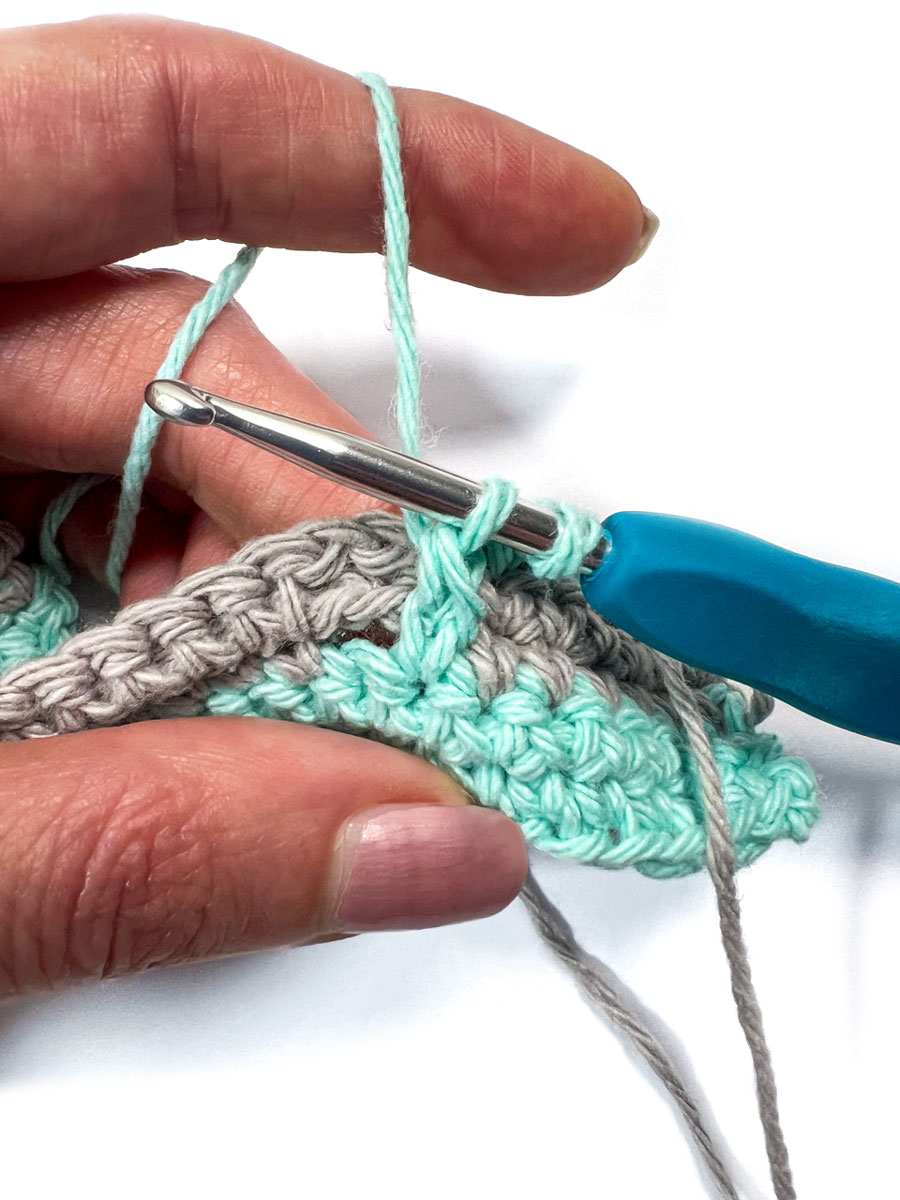
Pull up a loop. You now have 3 loops on your hook, like you would for a standard DC stitch.
Continue like you would a normal DC by yarning over and pulling through two loops.
Complete the stitch by yarning over and pulling through the last two loops.

Pattern
To Start
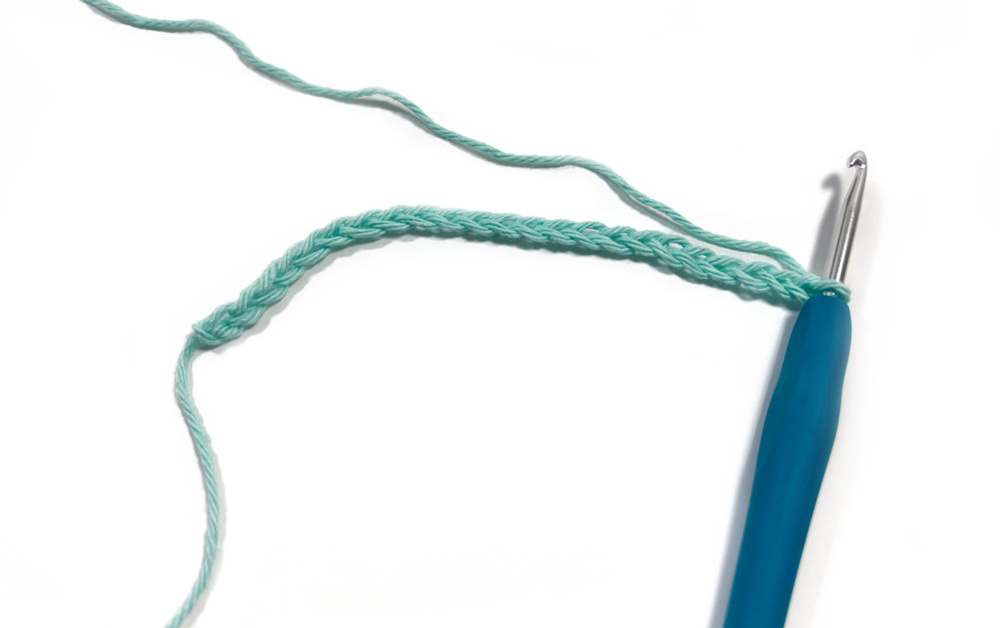
CH 23 with Color A.
Row 1:
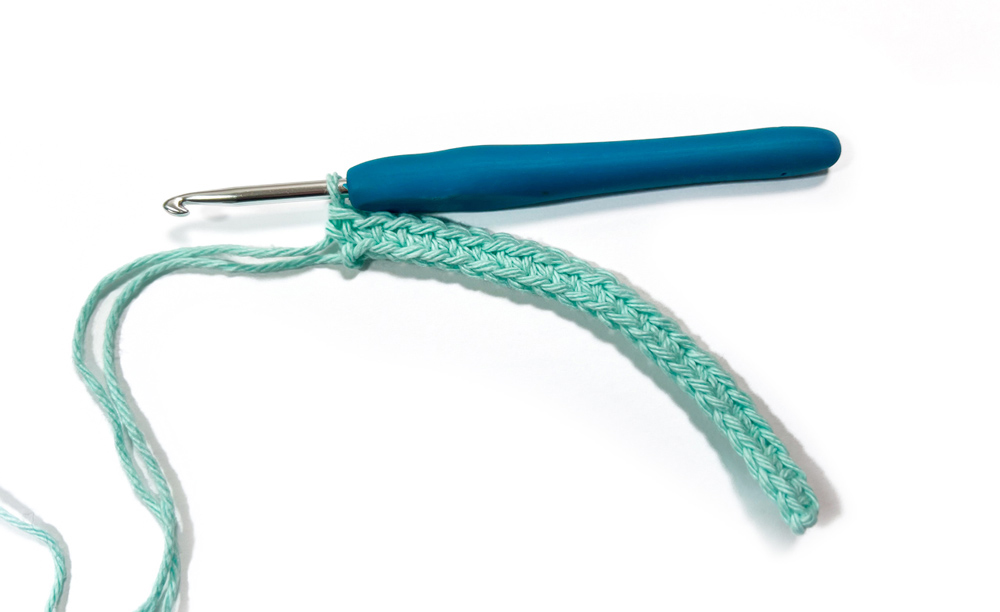
SC in 2nd CH from hook and in each ST across. (22)
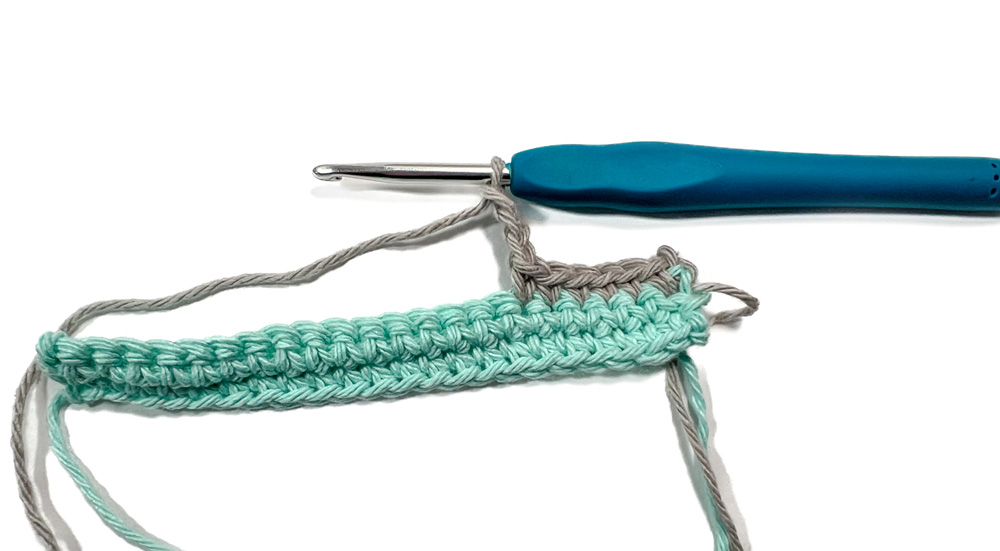
Row 2:
CH 1, turn. SC in the same ST and in each ST across. Change to Color B on the second pull through of the last ST of the row. Do not cut your original color – you’ll carry them up throughout the project. (22)
If you’re not planning to add a border or fringe, you may want to consider stitching your dropped color into the first SC of the next row. This will help keep the carry loops off the side of your project.
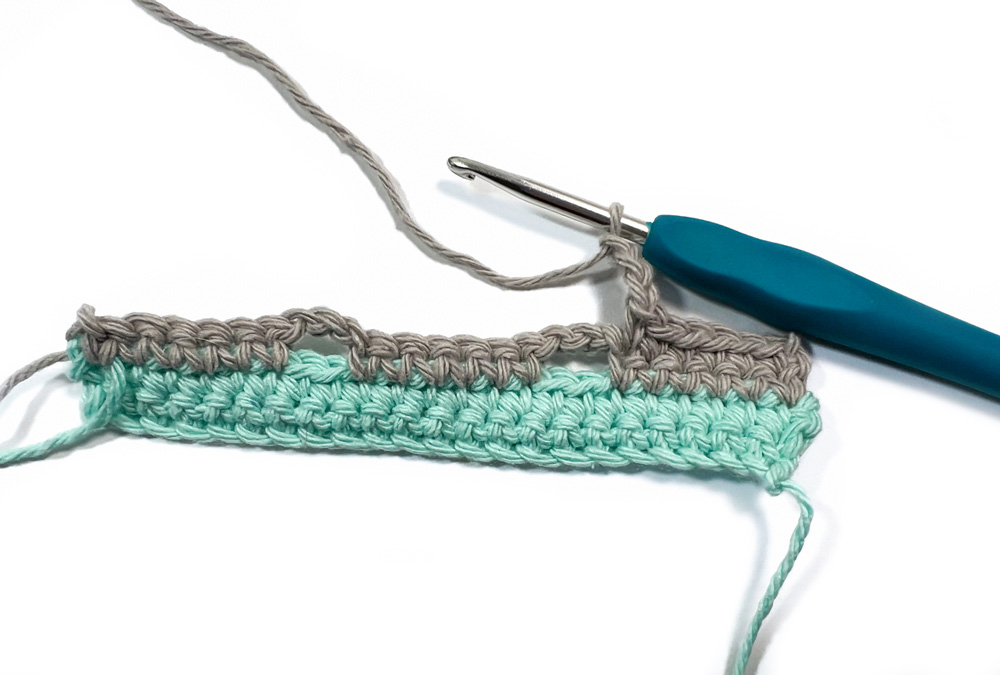
Row 3:
CH 1, turn. SC into the same ST and next 5 ST. CH 3, SK 2, then SC into the next 6 ST. CH 3, SK 2, then SC into the last 6 ST of the row.
Row 4:
CH 1, turn. SC into the same ST and next 5 ST. CH 3, SK the CH SP, then SC into the next 6 ST. CH 3, SK the CH SP, then SC into the last 6 ST of the row. Change to Color A by pulling it up the side of your project.
In inset mosaic crochet, you'll always chain one more stitch than you perform Drop-down Double Crochets to guarantee that the finished work lays flat. Example: in rows 3 and 4 you perform a CH 3 to prepare for the 2 Drop-down DCs you'll perform in the next row.
Row 5:
CH 1, turn. SC into the same ST and next 5 ST. Drop-down DC into each of the next 2 ST. SC in the following 2 ST. CH 3, SK 2, then SC in the following 2 ST. Drop-down DC into the next 2 ST, then SC into the last 6 ST of the row.
You can count the CH in the CH SP behind your drop-down DC to make sure you’re rejoining into the correct ST. Example: on row 5 there should be 3 empty CH behind your two DC stitches.
Row 6:
CH 1, turn. SC in the same ST and the next 9 ST. CH 3, SK the CH SP, then SC in the last 10 ST of the row. Change to Color B.
Row 7:
CH 1, turn. SC in the same ST and next 3 ST. CH 3, SK 2, SC in following 2 ST. CH 3, SK 2, Drop-down DC in following 2 ST. CH 3, SK 2, SC in following 2 ST. CH 3, SK 2, then SC in last 4 ST of the row.
Row 8:
CH 1, turn. SC in the same ST and the next 3 ST. CH 3, SK the CH SP, then SC in the next 2 ST. CH 3, SK the CH SP, then SC in next 2 ST. CH 3, SK the CH SP, then SC in next 2 ST. CH 3, SK the CH SP, then SC in the last 4 ST of the row. Change to Color A.
Row 9:
CH 1, turn. SC in the same ST and the following 3 ST. Drop-down DC in the next 2 ST. CH 3, SK 2, then Drop-down DC in the next 2 ST. SC in the following 2 ST. Drop-down DC in the next 2 ST, CH 3, SK 2, then Drop-down DC in the next 2 ST. SC in the last 4 ST of the row.
Row 10:
CH 1, turn. SC in the same ST and the following 5 ST. CH 3, SK the CH SP, then SC in the next 6 ST. CH 3, SK the CH SP, then SC in the last 6 ST of the row. Change to Color B.
Row 11:
CH 1, turn. SC in the same ST and the following ST. CH 3, SK 2, then SC in the next 2 ST. Drop-down DC in the next 2 ST, then SC in the following 2 ST. CH 3, SK 2, then SC in the next 2 ST. Drop-down DC in the next 2 ST, then SC in the next 2 ST. CH 3, SK 2, then SC in the last 2 ST of the row.
Row 12:
CH 1, turn. SC in the same ST and the following ST. CH 3, SK the CH SP, then SC in the next 6 ST. CH 3, SK the CH SP, then SC in the next 6 ST. CH 3, SK the CH SP, then SC in the last 2 ST of the row. Change to Color A.
Row 13:
CH 1, turn. SC in the same ST and the following ST. Drop-down DC in the next 2 ST. CH 7, SK 6, then Drop-down DC in the next 2 ST. CH 7, SK 6, then Drop-down DC in the following 2 ST. SC in the last 2 ST of the row.
Row 14:
CH 1, turn. SC in the same ST and the next 3 ST. CH 7, SK the CH SP, then SC in the next 2 ST. CH 7, SK the CH SP, then SC in the last 4 ST of the row. Change to Color B.
Row 15:
CH 1, turn. SC in the same ST and the following ST. CH 3, SK 2, then Drop-down DC in the next 6 ST. CH 3, SK 2, then Drop-down DC in the following 6 ST. CH 3, SK 2, then SC in the last 2 ST of the row.
Row 16:
CH 1, turn. SC in the same ST and the next ST. CH 3, SK the CH SP, then SC in the next 6 ST. CH 3, SK the CH SP, then SC in the next 6 ST. CH 3, SK the CH SP, then SC in the last 2 ST. Change to Color A.
Row 17:
CH 1, turn. SC in the same ST and the next ST. Drop-down DC in the next 2 ST, then SC in the next 2 ST. CH 3, SK 2, then SC in the following 2 ST. Drop-down DC in the next 2 ST, then SC in 2 ST. CH 3, SK 2, then SC in 2 ST. Drop-down DC in 2 ST, then SC in the last 2 ST of the row.
Row 18:
CH 1, turn. SC in the same ST and the next 5 ST. CH 3, SK the CH SP, then SC in the next 6 ST. CH 3, SK the CH SP, and SC in the next 6 ST. Change to Color B.
Row 19:
CH 1, turn. SC in the same ST and the next 3 ST. CH 3, SK 2, then Drop-down DC in the next 2 ST. CH 3, SK 2, then SC in the next 2 ST. CH 3, SK 2, then Drop-down DC in 2 ST. CH 3, SK 2, then SC in the last 4 ST of the row.
Row 20:
CH 1, turn. SC in the same ST and the next 3 ST. CH 3, SK the CH SP, then SC in the next 2 ST. CH 3, SK the CH SP, then SC in next 2 ST. CH 3, SK the CH SP, then SC in next 2 ST. CH 3, SK the CH SP, then SC in the last 4 ST of the row. Change to Color A.
Row 21:
CH 1, turn. SC in the same ST and next 3 ST. Drop-down DC in following 2 ST, then SC in 2 ST. Drop-down DC in 2 ST, CH 3, SK 2, then Drop-down DC in 2 ST. SC in the next 2 ST, Drop-down DC in 2 ST, then SC in last 4 ST of the row.
Row 22:
CH 1, turn. SC in the same ST and next 9 ST. CH 3, SK the CH SP, then SC in the last 10 ST. Change to Color B.
Row 23:
CH 1, turn. SC in the same ST and next 5 ST. CH 3, SK 2, and SC in the next 2 ST. Drop-down DC in the next 2 ST, then SC in the following 2 ST. CH 3, SK 2, then SC in the last 6 ST of the row.
Row 24:
CH 1, turn. SC in the same ST and next 5 ST. CH 3, SK the CH SP, then SC in the following 6 ST. CH 3, SK the CH SP, then SC in the last 6 ST of the row. Change to Color A.
Row 25:
CH 1, turn. SC in the same ST and the next 5 ST. Drop-down DC in the next 2 ST, then SC in the next 6 ST. Drop-down DC in the next 2 ST, followed by a SC in the last 6 ST of the row.
Row 26:
CH 1, turn. SC in the first ST and each ST across. Fasten off. If you’re including a border, follow along below. If not, weave in your ends.
Optional Border
Crochet Border
In my sample I used a simple SC border to not add a lot of extra dimension to the coaster. Feel free to use whatever kind of ST you would like to create your look.
Join with your selected yarn color into the top corner of your coaster. Work (SC, CH 1, SC) in the corner ST, then continue ST down the side of the project. You’ll work approximately one ST into each row of the coaster.
Be careful not to add too many ST to the side, as your work will start to flare out.
When you get to the bottom corner, place (SC, CH 1, SC) into the corner ST, then continue placing one ST into each ST on the bottom of the coaster. When you reach the next corner, place (SC, CH 1, SC) into the corner ST.
Keep working around all sides of the coaster. When you’ve finished your last ST, join with a SL ST into the top of the first ST. Fasten off and weave in your ends.
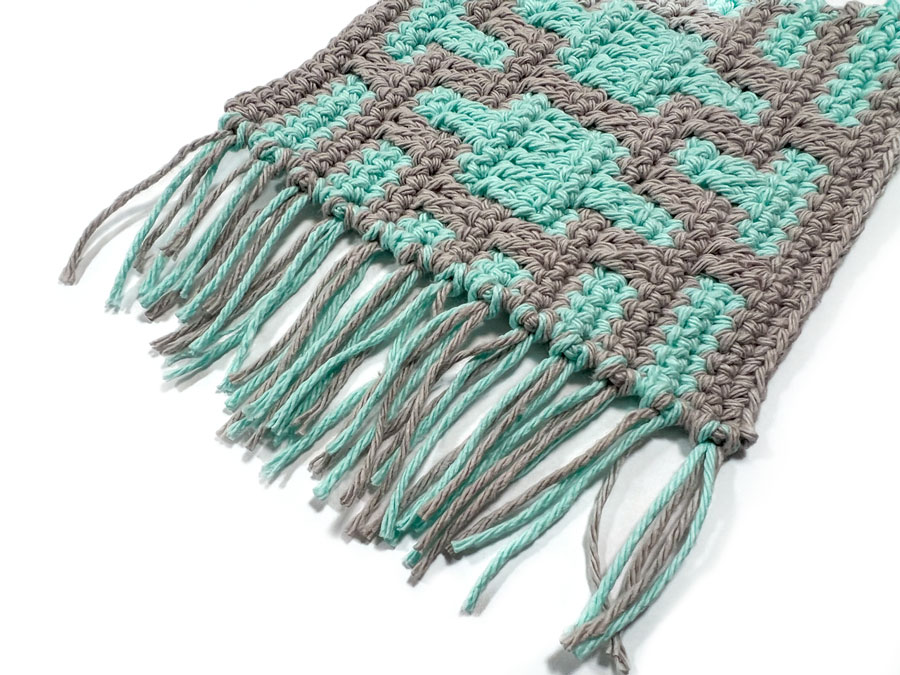
Fringe Border
Cut strands of both Color A and Color B to approximately 5” in length. Drop your crochet hook into the side of your rug from the top. Pull two strands at a time through the ST. Bring the four ends up through the loop created on the top of the work and pull tight.
Continue adding as much fringe as you like to both sides of your rug.
Optional Blocking
You may choose to block your coaster to flatten it and give it a squared-off shape. I found it necessary to block my rug with the crochet border but not with the fringe.
To block: pin your coaster to a foam surface (or your ironing board if it has a thick pad) and hit it with a little steam from a hot iron or steamer. Let dry and use!
Show and Tell
Tag @homespun.hues on IG to share your projects with me, and don't forget me on Pinterest @homespunhues. I'd love to see what you make!
Prefer a PDF pattern? They're available on Etsy.

Use code HUELOVE for 10% off your purchase.